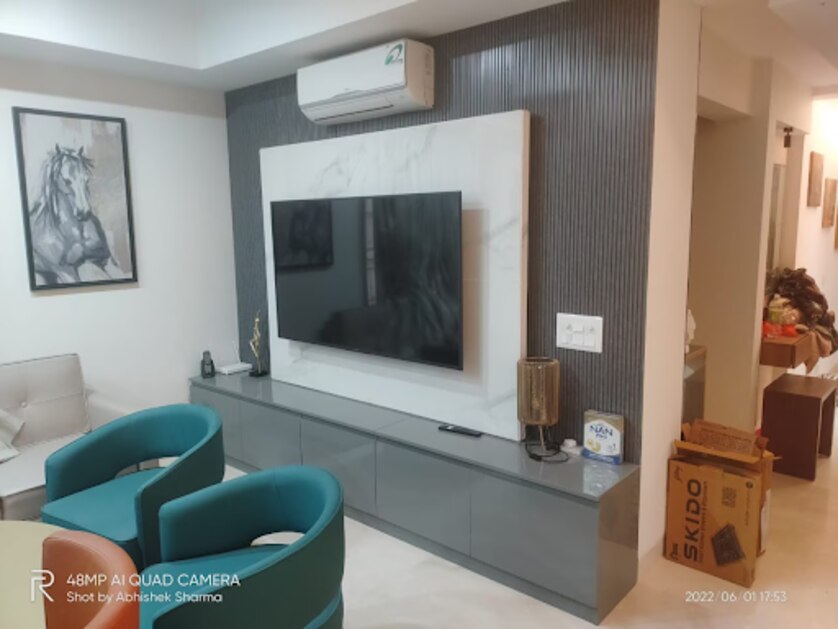
A TV unit has to fit more than the screen: wall dimensions, viewing position, equipment heat, cable access, storage habits and fixing loads all affect the design. By the end, you will be able to turn those conditions into a practical layout and a clear brief for a custom manufacturer.
Key takeaways
- Measure seated eye level before fixing the screen centreline.
- Size the TV bay for the screen, stand, soundbar and connected devices.
- Separate heat-producing equipment from enclosed storage and provide ventilation.
- Give the manufacturer cable paths, service access points and wall-support details.
Measure the wall and set the viewing position before designing the unit
The screen centreline belongs at a comfortable seated eye level, not at a standard cabinet height. Measure from the finished floor to your eyes while seated, then record the sofa’s distance from the wall, any reclined viewing position and the soundbar or centre-speaker clearance below the screen.
- Take the wall measurement for TV unit design: record finished width, height, ceiling height, skirting-board projection, sockets, windows, doors and the lowest or highest obstruction.
- Check the floor at several points. An uneven floor can make a long console appear tilted and alter drawer or cabinet clearances.
- Measure viewing distance from the seated eye position to the screen plane. For a 4K television, begin with roughly 1.5 to 2.5 times the screen diagonal; a narrow room may need a smaller screen or shallower unit.
- Set the TV viewing height by marking the planned screen centre on the wall at the seated eye level. Test it from the sofa, including reclined viewing, before fixing the position.
- Record the television’s overall width and height, not just its diagonal, plus bracket location, soundbar height and cable direction. These TV unit measurements prevent a drawer, shelf lip or soundbar from blocking the screen or sound path.
- Identify the wall substrate and mark fixing points. A wall-mounted screen must transfer its load into masonry or suitable studs, not a decorative back panel.
Confirm the marked position with cardboard or masking tape before production. This exposes an uncomfortable angle before the custom unit is built.
Size the TV bay around the real screen, stand and equipment
Measure the television itself, not its advertised diagonal, before fixing the TV unit dimensions. A 16:9 panel is approximately 0.8726 × its diagonal wide and 0.4903 × its diagonal high. Add the manufacturer’s overall size, then leave clearance for ventilation and cable bends.
A 65-inch panel is about 56.7 inches wide, but the complete television may be wider.
Set the TV bay size from these three measurements:
- Width: television width plus side clearance; include the stand if it sits inside the bay.
- Depth: the greater of the television depth, stand depth or rear connector clearance, plus space for a cable bend.
- Height: television height plus top and bottom clearance, with room for the soundbar and any lower equipment.
Mounting hardware requires the television’s VESA mounting pattern, expressed as horizontal × vertical hole spacing in millimetres. Confirm the screw size, hole depth, screw length and total mass in the TV manual; never select a bracket from screen size alone.
Soundbar placement needs its own measurement. Keep the front acoustic path open, and leave clear space above upward-firing Dolby Atmos models. A shelf lip or closed cubby can reflect or block sound.
Measure each device before finalising shelves:
- Set-top box or streaming device: allow ventilation around the housing.
- Game console: allow its full depth and side airflow.
- Centre speaker: reserve unobstructed space at ear-facing height.
Record every dimension on the shop drawing.
Assign storage zones and protect equipment from heat
Keep TV unit storage divided by heat, access and appearance rather than placing every item behind one door. Use this allocation:
| Zone | Put here | Design rule |
|---|---|---|
| Open display shelves | Books, décor, game cases and speakers | Keep the soundbar’s acoustic path clear; upward-firing Dolby Atmos speakers need unobstructed space above them. |
| Closed TV cabinets | Remotes, spare controllers, manuals, discs and décor | Use doors to control dust and visual clutter, not to enclose heat-producing electronics. |
| Drawers | Batteries, charging cables, headphones, controllers and small accessories | Add full-extension runners and dividers so heavy items do not become a tangled pile. |
| Ventilated equipment compartments | Set-top boxes, streaming devices, game consoles, power supplies and AV receivers | Provide the clearances stated in each equipment manual, plus rear cable and airflow space. |
A closed TV cabinet still traps heat. An AV receiver under multichannel load can generate far more heat than a streaming box; tight shelving with a closed front can cause thermal shutdown and reduce component life.
Give it AV receiver ventilation through an open back, louvres, a removable rear panel or active fans when the manual calls for it.
Check usable internal depth, not the cabinet’s advertised depth. Measure the largest device, connector projection and cable-bend space, then add front access for buttons, discs and cleaning. Adjustable shelves accommodate replacement equipment better than tightly fitted fixed shelves. Keep ventilation openings clear after doors, drawer fronts and décor are installed.
Plan cable routes, service access and structural support
Design the routes and fixing points before production, not after the cabinet reaches the wall. Specify the wall substrate, fixing schedule and load path so TV wall mounting support transfers weight into structural masonry or framing, never a decorative back panel or thin cabinet top.
A floor-standing console also needs anti-tip fixing because a rotated or pulled screen creates overturning force.
Build TV unit cable management around replaceable cables and reachable connections. Provide separate, generously sized paths for:
- Mains power
- HDMI cable routing
- Ethernet
- Speaker cable
- Optical audio
- Antenna cable
A single round hole rarely works: HDMI plugs need clearance, right-angle connectors bend differently, and a future cable should pass through conduit or a draw path without dismantling the unit. Keep mains and signal routes separated where practical, and avoid sharp bends or crushed cables.
Leave rear and front access to every active device, power strip and socket. A removable back, hinged service panel or fully accessible open bay is better than sealing equipment behind a fixed panel.
Check clear internal depth after allowing for connector projection and cable bend space; adjustable shelves accommodate replacement equipment better than tight fixed compartments.
Treat media console ventilation as a design requirement. Provide a rear air path and the manufacturer’s specified top, side and rear clearances for consoles, receivers and power supplies. Document the permitted substrate, anchor type, rail or steel frame, cable routes and removal method on the installation drawing.
Choose the right TV unit format and issue a build-ready manufacturer brief
Choose the format by load, storage volume, wall condition and visual scale—not by screen size alone.
| Option | Best fit | Main risk or requirement |
|---|---|---|
| Wall-mounted TV unit | Clean display with limited floor obstruction | Bracket loads need a fixing schedule tied to masonry or framing, never a decorative back panel |
| Floor-standing TV console | Heavy equipment, drawers and easy relocation | Anchor it against overturning when the screen is pulled or rotated |
| Full-height media wall | Maximum storage, tall rooms and concealed services | It consumes wall area and needs coordinated ventilation, access and accurate floor-to-ceiling measurements |
| Floating TV cabinet | Open floor, minimalist appearance and lighter visual mass | Continuous rails, structural blocking or a steel frame must transfer the cabinet load into the wall; ordinary drywall anchors are not enough |
Give the manufacturer a signed brief containing:
- Screen model, dimensions, bracket, soundbar, centre speaker, device list and each item’s required clearance
- Seated eye height, screen centre height, sofa and reclined viewing positions
- Wall substrate, fixing points, permitted anchors, floor level, skirting, ceiling height and an installation drawing
- Clear internal shelf depth, connector projection, front and rear service access, adjustable shelf positions and equipment ventilation
- Separate routes for power, HDMI, Ethernet, speaker, optical-audio and antenna cables, with conduit or a replaceable draw path
Madhav Tradelink can use this documented information to convert a custom wooden unit into a manufacturing drawing rather than relying on site guesses. Confirm finishes, edge details, door swings, drawer sizes, hardware, cable openings and approval signatures before production.
Frequently asked questions
How do you measure a wall before designing a custom TV unit?
Measure the finished wall width and height, then record seated eye level, sofa distance, reclined viewing position and speaker clearance.
What should a TV bay accommodate?
Size it for the actual screen, its stand if used, the soundbar or centre speaker, set-top box, game console and ventilation gaps.
How should storage and equipment zones be arranged?
Place display items in open shelves, heavier belongings in lower cabinets and heat-producing electronics in ventilated compartments away from heat-sensitive storage.
What information should you give a TV unit manufacturer?
Provide wall dimensions, viewing position, equipment sizes, cable routes, socket locations, service access requirements, material preferences and structural support needs.